Developing and using flats.


I decided to develop technical working drawings (or flats) for my garments that I have designed on Adobe Illustrator. They are time consuming and challenging to draw and I am still getting to grips with illustrator as a programme that is new to me.

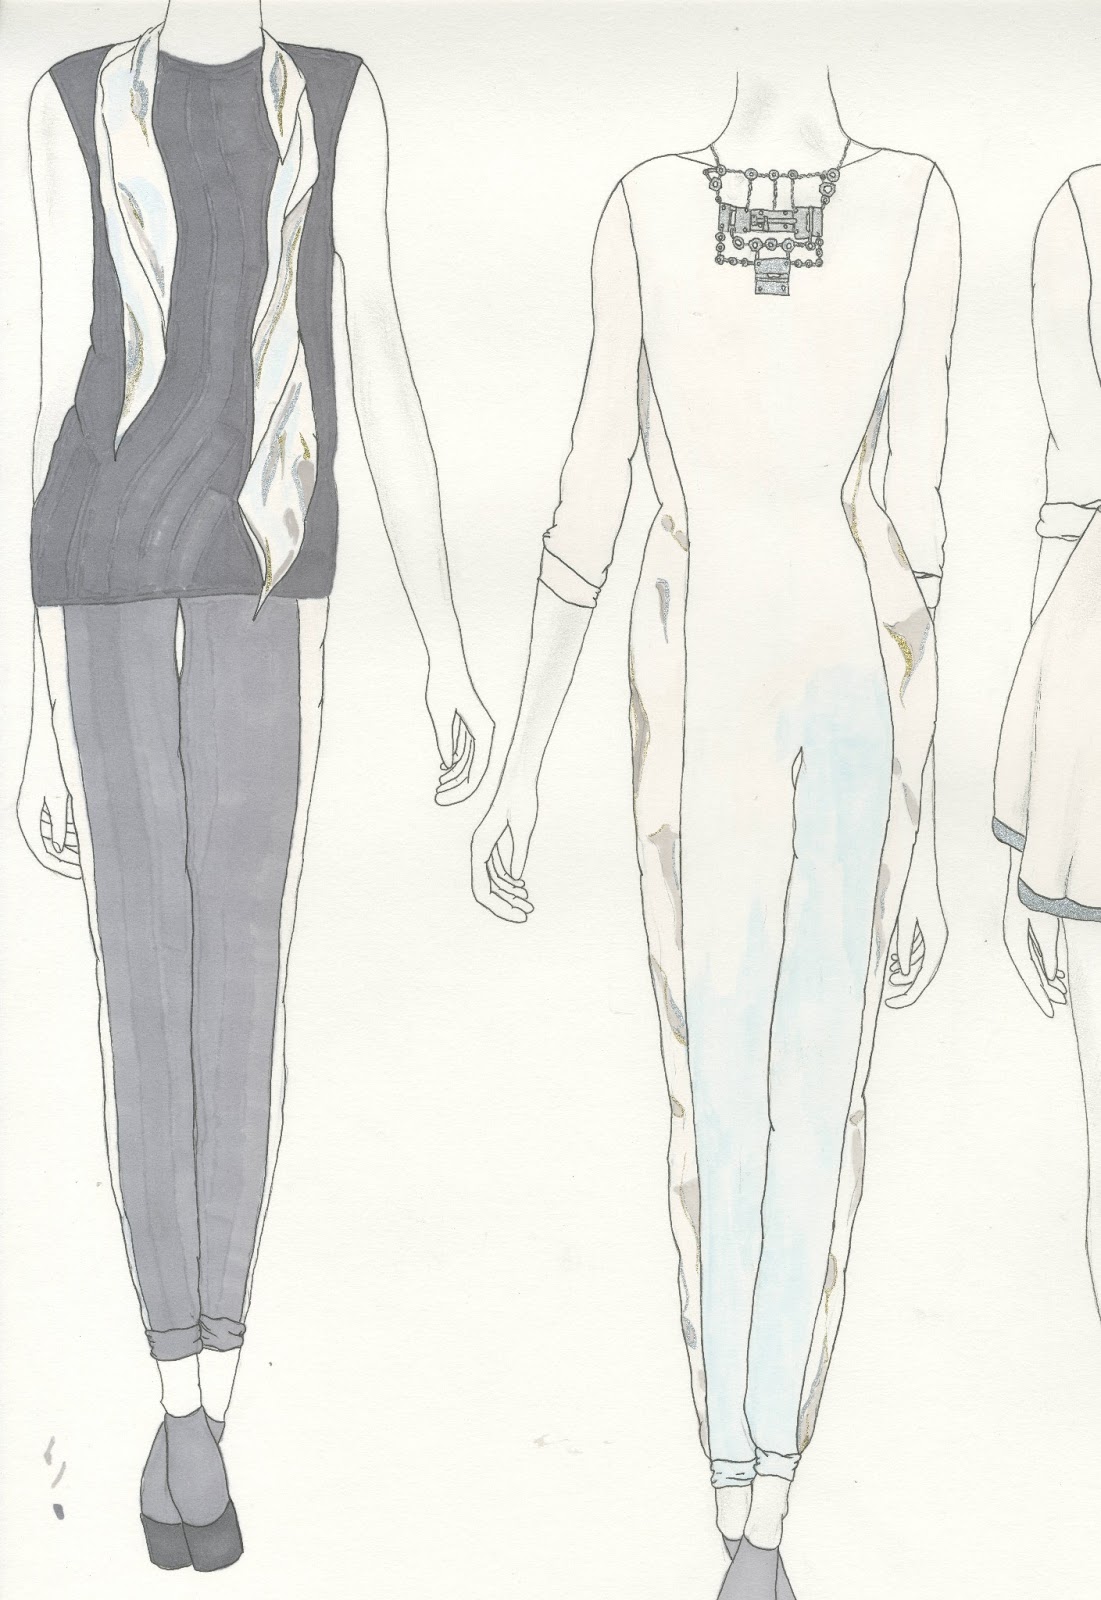
After getting the shape and movement of the garments right, I decided to display and present them with my prints applied onto them, thus providing another way of showing how my prints would appear when made into a garment.

Further fashion illustration styles


I wanted to work in a different style after successfully creating a series of drawings displaying full garments. I wanted to display my prints and embellishment samples through a fashion illustration so I again began with a drawing of a face (see left).

I then decided to manipulate the face by applying the print to the face itself and to the surroundings of the face. This means that the illustration could be used as a print indication board as well as setting the general mood for my collection of textile samples that could be used for fashion.

illustrations developed


I decided to develop garments and apply my prints through drawing with various media. I wanted to give the prints and embellishment samples a series of silhouettes to stand on in the form of garments. Therefore I decided to create dresses, jumpsuits and trousers etc for the samples to stand on.


 These then have been changed into a lineup of illustrations with the head that had been drawn earlier has been super-imposed on top and arranged in a professional manner.

Beginning fashion illustrations

I decided that the best way to develop my fashion illustration techniques was to draw a face first from a model found in a magazine. I chose to use model of the moment, Cara Delevigne, as she has featured in 99% of the shows at recent New York and London fashion week shows.


Applying samples to a body


I have a small wooden mannequin and decided that I would attach my samples that I have created to the mannequin, giving some form of indication as to how the garment could be used in the fashion world.

I draped the work over the small body, giving the impression of garment shapes and how the patterns and fabrics that I have created would look in this certain shape.


Knitting samples.

The first textile world that I was a part of was construct. I particularly enjoyed the knitting aspect of the construct world and now whilst in TD4F I decided to reapply my knitting skills to my project.

The sample featured on the left, shows a technique called "hooking up". This allows for some textures and buckles in the fabric and I decided to work into this with the embellishment techniques that I had developed before. This presented a new set of challenges in itself. The beads had to be carefully applied to ensure that they would stay on the right side of the fabric which turned out to be quite the nuisance. Regardless, I decided to work in the same way into the sample left, embellishing around the lace holes.

I then decided to continue using a loose knit, having a low tension and using lace holes and ladders to give the knit a loose structure and appearance.


Using embellishment as mark making.

I decided to use gold and silver seed beads on samples of fabric as a means of mark making. I painstakingly undertook the task of sewing on each bead individually so as you can imagine- they took HOURS.

Initially, I used calico on the right to embellish onto along with paint. I know this wasn't a fabric I wanted to use, however I just wanted to understand how the beads could create a mark.

On the left, I embellished the beads onto a sample of substantially more expensive untreated silk, a fabric that I'm more likely to use when applying my designs to garments etc.

Extended print ideas


I decided to layer my prints yet again, over the top of one and other, allowing a depth that the initial print did not have. the elements that overlap creates a new mark and changing the drawings yet again through digital manipulation.

print development

I decided to use my drawings and reflect certain parts of them to create a new print idea. I know that the idea of symmetry is a very 'done' idea and I do not enjoy regurgitating pre-existing work, particularly if it is not my own. 

I may use this as an initial start for my prints. This would mean that I could get this idea digitally printed onto fabric and then work into the fabric, using a variety of techniques to bring back the metallic element, such as foiling and embellishment.

I quite like the subliminal, Freudian appearance of the image, and this ties all the elements of my project together, creative mark making, metallic colours with blues and greys.

developing my drawings into prints

Once my initial drawings had been scanned in, I decided to manipulate these on photoshop, layering the drawings to create a new drawing. I played about with layering and changing the opacity of each layer which allows each drawing to come through and be seen. I like my choice of colour scheme and this will now be a theme throughout the unit. The pale blues work well with the gold and silvers and is contrasted well against the black marks.

I want to use these layered drawings and elements from these to create new prints and patterns that could be applied to the world of fashion- be it through garments or accessories etc.

Initial drawings using movement.

 These are the initial three drawings that I have created on A2 sheets of paper.

To start with, I don't feel that the scanned version of these images does the pictures justice. The original copy of these drawings accentuates the time and effort put into the drawings. The originals show the metallic ink being used to highlight and almost 'decorate' the marks that have been made on the page.


To start with, I put quite a substantial amount of paint on my knuckles and hands and attached my paper to the door in my flat. Then I knocked on the paper, allowing the mark made when knocking and pushing the door to be recorded by the paint.


 I then decided to work back into the initial marks using a variety of media such as a hard pencil, a very fine fineliner and then finally metallic inks in gold and silver. 

This created quite beautiful marks and has formed the basis of work that I am going to go on to create, through print etc.